Craving gluten-free tiramisu but worried it won’t match the authentic Italian experience? Despite common belief, this classic dessert can be masterfully recreated without gluten while maintaining its luxurious layers and rich flavors.
If you want to explore authentic Italian techniques even further, check out these Italian cooking classes in NYC.
For many dessert lovers with gluten sensitivities, finding recipes that don’t compromise on taste can be challenging. Traditional tiramisu relies on ladyfingers—biscuits typically made with wheat flour—creating a significant hurdle for those avoiding gluten. Fortunately, a gluten free tiramisu recipe isn’t just possible; it can be absolutely delicious when you have the right approach.
This comprehensive guide will walk you through exactly how to make gluten free tiramisu that rivals any traditional version. We’ll cover everything from sourcing the perfect gluten-free ladyfingers to achieving that perfect balance of coffee, mascarpone, and cocoa. Whether you’re a seasoned baker or attempting tiramisu for the first time, you’ll discover that this Italian classic is actually within reach—no gluten required.
Understanding the Basics of Tiramisu
Tiramisu stands as an elegant testament to Italian culinary artistry. Before diving into gluten-free adaptations, understanding what makes authentic tiramisu special is essential for recreating its magic without gluten.

What makes tiramisu unique
The name “tiramisu” translates to “pick me up” or “carry me up” in Italian, alluding to both its uplifting effect and heavenly taste. This beloved dessert distinguishes itself through its harmonious balance of contrasting elements.
Primarily, tiramisu features a distinctive layered structure. Unlike other desserts, it combines coffee-soaked ladyfingers (savoiardi) with a rich mascarpone cream, creating a perfect contrast between soft, moist sponge and silky creaminess For a true taste of Italian cooking at a private event, you can also book a private chef experience in NYC.. The final dusting of bitter cocoa powder adds complexity that prevents the dessert from becoming overly sweet.
Notably, authentic tiramisu does not contain cream or milk. Instead, the traditional mascarpone mixture includes only eggs, sugar, and mascarpone cheese, occasionally with vanilla or other flavorings. This misconception often leads to Americanized versions that are lighter and fluffier than the authentic, denser Italian original.
Furthermore, the robust coffee flavor is fundamental to tiramisu’s identity. Strong espresso provides the necessary depth and intensity, creating a sophisticated flavor profile that distinguishes it from other layered desserts.
How traditional tiramisu is made
Traditional Italian tiramisu follows a precise preparation method passed down through generations. The process begins with separating eggs, as each part serves a specific purpose in creating the perfect texture.
The egg yolks are beaten with sugar until pale and creamy—a process called “ruban”. This mixture is then combined with mascarpone cheese. Separately, egg whites are whipped with sugar until stiff peaks form, then gently folded into the mascarpone mixture. This technique creates the characteristic light yet rich consistency that defines authentic tiramisu.
For the coffee soak, espresso is prepared (occasionally enhanced with liqueur like Marsala wine, amaretto, or rum). The ladyfingers are quickly dipped—a mere 1-2 seconds to prevent oversaturation. The assembly involves alternating layers of soaked ladyfingers with the mascarpone cream, finishing with a generous dusting of unsweetened cocoa powder.
Originally, tiramisu contained raw eggs, though modern recipes often include a cooking step for food safety. After assembly, the dessert requires sufficient chilling time—typically 6 hours minimum, but preferably overnight—allowing flavors to meld and textures to set perfectly.
Why gluten-free tiramisu is different
The principal difference between traditional and gluten-free tiramisu lies in the ladyfingers. Classic savoiardi biscuits contain wheat flour and therefore gluten, making traditional tiramisu unsuitable for those with celiac disease or gluten sensitivity.
Creating gluten-free tiramisu requires specially crafted ladyfingers made from alternative flours such as rice flour and other gluten-free starches. These gluten-free ladyfingers must achieve the same delicate texture capable of absorbing coffee without disintegrating, a significant challenge in gluten-free baking.
Essentially, every other element of authentic tiramisu—the mascarpone mixture, coffee soak, and cocoa dusting—remains unchanged in gluten-free versions. The mascarpone cheese, eggs, coffee, and cocoa powder are naturally gluten-free, so the focus is solely on creating or sourcing suitable gluten-free ladyfingers.
When properly executed, a gluten-free tiramisu can be virtually indistinguishable from its traditional counterpart. The key lies in understanding the critical role each ingredient plays in creating this beloved Italian dessert, then faithfully recreating the gluten-containing elements without compromising texture or flavor.
Essential Ingredients for Gluten-Free Tiramisu
Creating the perfect gluten-free tiramisu begins with selecting the right ingredients. Each component plays a crucial role in achieving that authentic Italian flavor and texture without gluten. Let’s explore what you’ll need for your gluten-free masterpiece. Visit Loza NYC, call us and reserve you event.
Choosing the right gluten-free ladyfingers
The foundation of any tiramisu is the ladyfingers, which present the primary challenge when making a gluten-free version. Schär’s gluten-free ladyfingers are often considered the best commercial option available. These Italian-imported biscuits are specifically designed to maintain their structure even when soaked, making them ideal for tiramisu. They’re also free from preservatives, lactose, and are non-GMO.
If you can’t find store-bought options, homemade gluten-free ladyfingers are completely feasible. A basic recipe typically includes egg yolks, egg whites, sugar, a gluten-free flour blend, cornstarch, xanthan gum, and baking powder. The resulting ladyfingers should have enough structural integrity to absorb coffee without disintegrating—a critical quality for tiramisu.
Mascarpone vs cream cheese
Mascarpone cheese is non-negotiable for authentic tiramisu. This rich Italian cheese has a butterfat content of approximately 75%, significantly higher than American cream cheese’s 55%. This higher fat content gives mascarpone its luxurious mouthfeel and subtle sweetness that’s essential for traditional tiramisu.

Although cream cheese is sometimes suggested as a substitute, the difference is substantial. Mascarpone offers a milder, less tangy flavor profile and a velvety, looser texture compared to cream cheese’s firmer consistency. For gluten-free tiramisu that truly replicates the classic Italian dessert, mascarpone should not be compromised—its rich, buttery character simply cannot be matched by tangier alternatives.
Coffee and liqueur options
Strong coffee or espresso forms the foundation of tiramisu’s distinctive flavor. Fresh espresso provides the most authentic taste, although strong brewed coffee or espresso powder dissolved in hot water works as well.
Regarding alcohol, traditional tiramisu typically includes one of several liqueur options. Marsala wine is the most traditional choice, offering warm caramel notes that complement the coffee and mascarpone. Alternative liqueurs include Kahlúa (coffee liqueur), amaretto (almond liqueur), dark rum, or brandy—each adding its unique character to the dessert.
For an alcohol-free version, simply omit the liqueur entirely and perhaps increase other components slightly to compensate for volume.
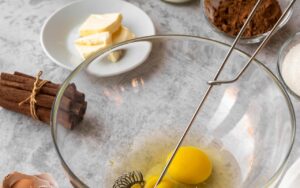
Eggs: raw, pasteurized, or cooked
Eggs are essential for creating tiramisu’s signature texture and richness. Traditional recipes use raw eggs, which poses food safety considerations. For those concerned, several approaches exist:
- Use pasteurized eggs, which are heated in the shell to kill bacteria without cooking the eggs.
- Cook egg yolks with sugar over a double boiler (reaching 160-165°F) to create a zabaglione before incorporating them into the mascarpone mixture.
- Replace egg whites with whipped heavy cream (4 egg whites can be substituted with 1.5 cups of heavy cream).
The cooking method (option 2) is generally preferred by most home cooks concerned about consuming raw eggs.
Cocoa powder and optional toppings
The finishing touch on any tiramisu is a generous dusting of cocoa powder. Unsweetened cocoa powder (preferably Dutch-processed) creates the perfect bitter counterpoint to the sweet, creamy layers beneath.
Apply the cocoa powder using a fine-mesh strainer or sieve for even distribution across the top layer. For added indulgence, grated dark chocolate makes an excellent alternative or additional topping.
Remember to add the cocoa powder just before serving rather than in advance, as this preserves its appearance and prevents it from absorbing moisture and becoming soggy.
Step-by-Step Preparation Guide
Transforming individual ingredients into a spectacular gluten-free tiramisu requires proper technique at each stage. This step-by-step guide with Zivko will walk you through the entire process, ensuring perfect results even for first-time tiramisu makers.
Making or sourcing gluten-free ladyfingers
Finding store-bought gluten-free ladyfingers can be challenging, which makes homemade ones an excellent option. To make your own, whip 3 egg whites with half the sugar until stiff peaks form. In a separate bowl, beat 2 egg yolks with remaining sugar until pale and fluffy. Gently fold yolks into whites, then sift in gluten-free flour, cornstarch, xanthan gum, and baking powder. Pipe 4-inch lines onto parchment-lined baking sheets and dust with sugar. Bake initially at 355°F for 15 minutes, subsequently reducing to 300°F for 12-15 minutes. This second baking at lower temperature is crucial for achieving the proper dry texture needed for soaking.
Preparing the mascarpone cream
For the mascarpone cream, two methods yield excellent results. The first option involves whipping cold heavy cream with sugar until medium peaks form. Separately, beat egg yolks and sugar in a double boiler for exactly 2 minutes until light and fluffy. Combine mascarpone with the egg mixture and vanilla, then fold in the whipped cream. Alternatively, use egg whites instead of cream by creating a meringue. Whisk egg whites with sugar over simmering water until reaching 160°F, then beat until glossy and stiff. Fold this meringue gently into the mascarpone-egg yolk mixture.
Creating the coffee soak
Begin by brewing strong espresso or coffee and allowing it to cool completely. The coffee should be room temperature or chilled before use. For authentic flavor, mix the cooled coffee with a tablespoon of sugar and, optionally, a splash of liqueur such as dark rum, Marsala wine, or amaretto. Never add sugar directly to the coffee if you prefer a less sweet tiramisu, as the bitterness balances the sweetness of other components.
Layering the tiramisu
Start assembly by spreading a thin layer of mascarpone cream at the bottom of your dish. Quickly dip each ladyfinger into the coffee mixture—just 1-2 seconds per side is sufficient. Any longer will cause them to become soggy and fall apart. Arrange soaked ladyfingers closely in a single layer. Cover completely with half the mascarpone cream and spread evenly. Repeat with another layer of soaked ladyfingers and top with remaining cream. Dust generously with cocoa powder right before serving.
Chilling and setting the dessert
After assembly, cover the tiramisu with plastic wrap and refrigerate for at least 6 hours, preferably overnight. This chilling period is non-negotiable—it allows flavors to meld and textures to set properly. During this time, the ladyfingers absorb moisture and soften to the perfect consistency. Properly stored, tiramisu will keep in the refrigerator for up to 4 days. For longer storage, it can be frozen (without cocoa powder) for up to 3 months.
Customizations and Dietary Alternatives
Fortunately, gluten-free tiramisu can be adapted for various dietary needs beyond just eliminating gluten. These modifications maintain the essence of this beloved Italian dessert while accommodating additional restrictions.
Egg-free and dairy-free options
For a completely plant-based gluten-free tiramisu, several creative substitutions work wonderfully. In place of traditional mascarpone, blend soaked cashews with vegan Greek-style yogurt and a touch of lemon juice to mimic that distinctive creamy texture. Alternatively, combine vegan cream cheese with non-dairy milk for a quick version that closely resembles traditional mascarpone.
For egg-free versions, some recipes substitute the eggs in the mascarpone cream with whipped coconut cream or non-dairy heavy cream. The result remains impressively creamy and indulgent, even without traditional ingredients.
Alcohol-free substitutions
Creating alcohol-free tiramisu is straightforward:
- Replace Marsala or rum with rum extract for similar flavor without alcohol
- Compensate for reduced liquid by adding extra coffee to the soaking mixture
- Consider using hot chocolate instead of coffee for a kid-friendly variation
- Simply omit alcohol entirely—the coffee provides plenty of flavor on its own
Using sponge cake instead of ladyfingers
Many tiramisu makers actually prefer using gluten-free sponge cake over ladyfingers. This substitution creates excellent results since the sponge:
- Soaks up just enough coffee without becoming overly soggy
- Creates perfect texture balance with mascarpone layers
- Can be easily cut to fit any dish shape
- Often proves easier to find or make than gluten-free ladyfingers
To prepare the cake for tiramisu, allow it to cool completely, then cut into appropriate shapes. Pricking the cake with a toothpick before adding coffee ensures thorough soaking.

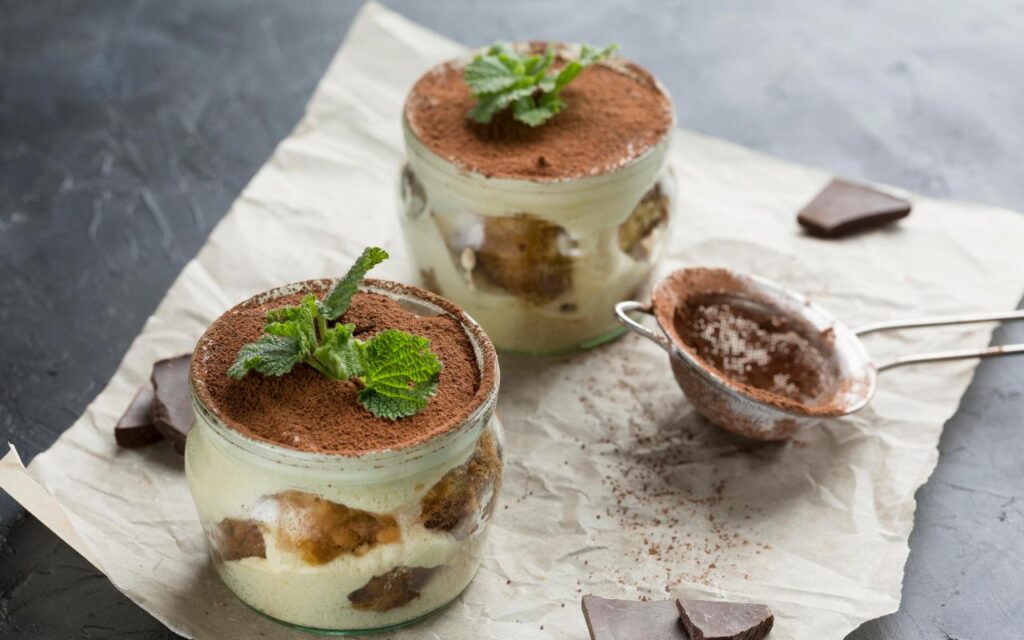
Making individual servings
Individual tiramisu portions make elegant desserts for special occasions. Use dessert glasses, ramekins, or cups for personalized servings. These smaller portions allow for:
- Customization for different dietary needs
- Preparation 1-2 days in advance (without cocoa powder topping)
- Easier freezing and storage options
- More precise control over coffee soaking
For these personal portions, either crumble the cake for a rustic appearance or use circular cutters sized to match your serving vessels for a neat, layered presentation.
If you enjoy refined Italian-style dining, explore Loza NYC’s private dining experiences for inspiration.
Tips for Success and Storage
Proper storage makes all the difference between a spectacular gluten-free tiramisu and a disappointing dessert experience. Mastering a few key techniques ensures your creation maintains its perfect texture and flavors.
How long to chill for best results
The optimal chilling time for gluten-free tiramisu is a minimum of 6 hours, nonetheless overnight refrigeration yields superior results. This essential resting period allows the ladyfingers to properly absorb moisture and for flavors to meld completely. Some recipes even recommend 5 hours minimum chilling, affirming that flavors improve the longer the dessert rests.
Avoiding soggy layers
The classic mistake in tiramisu preparation involves over-soaking the ladyfingers. Quick dipping—no more than a few seconds per side—prevents mushiness. Alternatively, brushing the coffee mixture onto ladyfingers gives you greater control over the moisture level. For gluten-free ladyfingers that become too soggy, placing them briefly in a warm oven (100°C/Gas Mark 0.25) helps firm them up.
Freezing and defrosting tips
Gluten-free tiramisu freezes excellently for up to 3 months. Accordingly, first portion the dessert, then wrap individual pieces tightly in plastic wrap followed by aluminum foil. Omit cocoa powder before freezing and add it fresh after thawing. Defrost overnight in the refrigerator, never at room temperature.
How long it keeps in the fridge
Homemade tiramisu stays fresh for 3-4 days in the refrigerator, whereas store-bought versions may last 5-7 days due to added preservatives. Always use airtight containers to prevent odor absorption and drying.